其实接下来的步骤和在实际机器上安装是一样的。
1.安装xorg:
pacman -S xorg
然后安装hwd:
pacman -S hwd
配置xorg: hwd -xa (好像前面提到的一个文章里面有误,他写成了 hwd -ax)
2.安装Alsa:
pacman -S alsa-lib alsa-utils
配置:
alsaconf
调节音量:
alsamixer
加入audio组:
gpasswd -a zhanlu audio
设置开机自动加载:
把/etc/rc.conf最后一行改为:
DAEMONS=(syslog-ng network netfs crond alsa)
3.安装中文字体:
pacman -S wqy-bitmapfont
pacman -S wqy-zenhei
4.安装scim:
pacman -S scim scim-pinyin
5.安装桌面环境:
pacman -S gdm
把/etc/rc.conf最后一行改为:
DAEMONS=(syslog-ng network netfs crond alsa gdm)
安装gnome:
pacman -S gnome
安装gnome终端:
pacman -S gnome-terminal
现在重启就能进入桌面系统了。以后装软件用pacman就好,跟Debian系列里面的apt-get命令一样好用。一句题外话,pacman采用wget断点续传,如果网络有问题,可以把下载进程关掉,然后rm /var/lib/pacman/db.lck,重新下载就行。
2009年3月26日星期四
2009年3月24日星期二
在VirtualBox中安装Arch Linux(一)
这里是一个简化版的安装指南,如果有时间建议参考Whitehat(白帽子)的著作《Hello ArchLinux 让新手创造出自己的Linux》以及Toy、Ning Bao的著作《打造完美的Linux 桌面 Archlinux 2007.08-2》,这两个都能在网上找到pdf文件。
1.获得ArchLinux镜像
在http://www.archlinux.org/download/里面找一个离自己最近的网站,下载最新的core-iso。典型安装就是刻盘安装,刻录速度一般建议不要超过16倍速。当然也可以直接放在硬盘上安装,不过其中有些技巧,不是初学者能够掌握的。而这里讨论的是在VirtualBox下的安装,这个倒是不用刻盘,直接可以把iso文件当成启动光盘来用。
2.在VirtualBox下面给ArchLinux划分一个空间,详细情况可以参考前面的一个笔记,虽然那里面的例子是给Windows XP划分空间,实际操作大同小异。
3.启动ArchLinuxCD,参考同一个笔记。
4.开始安装,选择安装方式:光盘安装。
5.硬盘分区:
这里给一个分区列表的例子,虚拟机里面一共有8G空间。
把/boot设置成bootable。完成这步保存一下,稍做休息,活动一下筋骨。马上就要正式安装了,相比有点激动吧。
6.选择软件包:
用空格选定软件包,建议最少安装base软件包。选好之后,OK一下就马上安装了,这步大概要十多分钟吧,看机器性能而定。
7.配置系统:
看自己喜好,nano比较简单,不过个人倾向于用vi。主要是修改一下rc.conf, locale.gen, 以及mirrorlist。在rc.conf中,如果用DHCP把原来的eth0那行注释掉,改成:
eth0="dhcp"
如果使用静态IP还需要自己配置一下。
在locale.gen中找到
zh_CN.GB18030 GB18030
zh_CN.GBK GBK
zh_CN.UTF-8 UTF-8
zh_CN.GB2312
去掉前面的#号。
在mirrorlist里面把离自己最近的那个镜像放到第一位,这样以后用pacman的时候就会省很多事情。
还有就是最后要设置一下root的密码。
然后又是OK,开始等待的过程,可以喝点水,吃点东西,洗个澡什么的。
8.安装Grub:
这步非常简单,敲几次回车就好了。
9.重启系统:
看到登陆的界面了,不错!新建一个用户:
useradd -m -s /bin/bash zhanlu
设置密码:
passwd zhanlu
10.更新系统:
先看看网卡是不是配置好:
ping -c 3 www.google.com
如果没有那就要重新配置一下。如果可以的话,运行
pacman -Syu
1.获得ArchLinux镜像
在http://www.archlinux.org/download/里面找一个离自己最近的网站,下载最新的core-iso。典型安装就是刻盘安装,刻录速度一般建议不要超过16倍速。当然也可以直接放在硬盘上安装,不过其中有些技巧,不是初学者能够掌握的。而这里讨论的是在VirtualBox下的安装,这个倒是不用刻盘,直接可以把iso文件当成启动光盘来用。
2.在VirtualBox下面给ArchLinux划分一个空间,详细情况可以参考前面的一个笔记,虽然那里面的例子是给Windows XP划分空间,实际操作大同小异。
3.启动ArchLinuxCD,参考同一个笔记。
4.开始安装,选择安装方式:光盘安装。
5.硬盘分区:
这里给一个分区列表的例子,虚拟机里面一共有8G空间。
              /boot 100MB  ext2 Primary
              swap  512MB  swap Primary
              /     2048MB ext3 Primary
              /home 3072MB ext3 Logical
              /usr  other  ext3 Logical
把/boot设置成bootable。完成这步保存一下,稍做休息,活动一下筋骨。马上就要正式安装了,相比有点激动吧。
6.选择软件包:
用空格选定软件包,建议最少安装base软件包。选好之后,OK一下就马上安装了,这步大概要十多分钟吧,看机器性能而定。
7.配置系统:
看自己喜好,nano比较简单,不过个人倾向于用vi。主要是修改一下rc.conf, locale.gen, 以及mirrorlist。在rc.conf中,如果用DHCP把原来的eth0那行注释掉,改成:
eth0="dhcp"
如果使用静态IP还需要自己配置一下。
在locale.gen中找到
zh_CN.GB18030 GB18030
zh_CN.GBK GBK
zh_CN.UTF-8 UTF-8
zh_CN.GB2312
去掉前面的#号。
在mirrorlist里面把离自己最近的那个镜像放到第一位,这样以后用pacman的时候就会省很多事情。
还有就是最后要设置一下root的密码。
然后又是OK,开始等待的过程,可以喝点水,吃点东西,洗个澡什么的。
8.安装Grub:
这步非常简单,敲几次回车就好了。
9.重启系统:
看到登陆的界面了,不错!新建一个用户:
useradd -m -s /bin/bash zhanlu
设置密码:
passwd zhanlu
10.更新系统:
先看看网卡是不是配置好:
ping -c 3 www.google.com
如果没有那就要重新配置一下。如果可以的话,运行
pacman -Syu
2009年3月23日星期一
安装Arch Linux的原因
在distrowatch.com上面的Linux有好几百个不同的发行版,它的排名并不是太高。不过从高排名的系统来看,有很大一部分是Debian系列的,其次是Red Hat的衍生物,Arch Linux作为单独的一个分支能排名这么靠前其实也不容易。湛卢之所以选择这个发行版有两方面的原因。第一、Arch Linux属于轻量级的发行版本,和gentoo一样不强迫用户安装一些没有必要的软件包,甚至它都不给用户定义默认桌面管理系统。这对于Linux爱好者来说,很有吸引力,自己可以选择安装任何一种自己喜好的。当然这也是一把双刃剑,对于初学者来说无疑给安装带来了一定的困难,必须自己学习安装配置xorg,然后才能安装桌面管理系统。不过,也不必过于担心,至少可以从网上找到两个关于安装Arch Linux的简明手册,一本是WhiteHat(白帽子)在2007年9月末写的《Hello ArchLinux 让新手打造出自己的Linux》,另一本手册是Toy、Ning Bo在2007年8月写的《打造完美的Linux桌面》。按照这两本手册,即使是初学者,在尝试几次之后也一定能够打造出自己的Linux。第二个原因也非常重要,湛卢一直考虑安装一个类似于gentoo的系统,不过后来从网上看到gentoo的介绍,其中最大的诟病就是安装起来非常耗时,比如说,有人曾经提起光是编译一个KDE就需要9个多小时,这也就使湛卢很早打消了安装gentoo的念头。Arch Linux信奉的哲学是K.I.S.S - Keep It Simple, Stupid。它正好满足了湛卢的各种需要,而且很重要一点就是它有一个很好用的包管理系统pacman,使用起来几乎跟apt-get一样方便,而且软件包比Debian的源更新。而且VT也有Arch Linux的源,这更就坚定了湛卢尝试的决心,目前最新的版本是Arch Linux 2009.2。后来修改了pacman的站点列表,把VT的源放在了第一位,更新软件的速度感觉不是一般的快。
在c中调用gnuplot
在c里面调用gnuplot,可以直接把图形输出到文件:
也可以动态显示图形:
# surface.c
#include
/*
        Author: Ioan Vancea (www.vioan.ro)
        *****************************/
int main()
{
        FILE *pipe = popen("gnuplot -persist","w");
        fprintf(pipe, "set samples 40\n");
        fprintf(pipe, "set isosamples 40\n");
        fprintf(pipe, "set hidden3d\n");
        fprintf(pipe, "set xrange [-8.000:8.000]\n");
        fprintf(pipe, "set yrange [-8.000:8.000]\n");
        fprintf(pipe, "set zrange [-2.000:2.000]\n");
        fprintf(pipe, "set terminal png\n");
        fprintf(pipe, "set output 'graph.png'\n");
        fprintf(pipe, "set title 'We are plotting from C'\n");
        fprintf(pipe, "set xlabel 'Label X'\n");
        fprintf(pipe, "set ylabel 'Label Y'\n");
        /* fprintf(pipe, "plot 'datafile.dat' using 1:2\n");*/
        fprintf(pipe, "splot cos(x)+cos(y)\n");

  close(pipe);
  return 0;
}
也可以动态显示图形:
# popen.c

#include
#include
#include
#include
#include
#include

#define PANIC(a) do { \
                perror(a); \
                if (temp_name) unlink(temp_name);\
                exit(1);\
        } while(0)

int main() {
    FILE *command,*data;
    char *temp_name;
    double a,b;
    int i;

    if ((temp_name = tmpnam((char *) 0)) == 0) PANIC("tmpnam failed");
    if(mkfifo(temp_name, S_IRUSR | S_IWUSR) != 0) PANIC("mkfifo failed");
    command = popen("gnuplot","w");
    fprintf(command,"plot \"%s\" with lines\n",temp_name); fflush(command);
    data = fopen(temp_name,"w");
    for (i=0; i<20; i++) {
        a = i/10.0;
        b = sin(a);
        fprintf(data,"%f %f\n",a,b);
    }
    fclose(data);
    fprintf(stderr,"press enter to continue..."); fflush(stderr);
    getchar();

    fprintf(command,"plot \"%s\" with lines\n",temp_name); fflush(command);
    data = fopen(temp_name,"w");
    for (i=0; i<20; i++) {
        a = i/10.0;
        b = cos(a);
        fprintf(data,"%f %f\n",a,b);
    }
    fclose(data);
    fprintf(stderr,"press enter to continue..."); fflush(stderr);
    getchar();
    fclose(command);
    unlink(temp_name);
    return 0;
}
在LaTeX下面输入中文
以前最流行的一种方式是LaTeX+CJK来输入中文,现在因为有了XeTeX,有一种更简单的方式,那就是用XeLaTeX来编译,可以直接从UTF-8格式的tex文件中输入中文。下面是两个例子:
% sample1.tex

%!TEX encoding =  UTF-8 Unicode
\documentclass{article}
\usepackage{amsmath}
\usepackage{fontspec}
\usepackage{xunicode}
\usepackage{indentfirst}
\usepackage{graphicx}
\setromanfont{SimSun}
\XeTeXlinebreaklocale "zh"
\XeTeXlinebreakskip = 0pt plus 1pt minus 0.1pt
\newcommand\Helvetica{\fontspec{Helvetica}}
\newcommand\Times{\fontspec{Times}}
\newcommand\Kai{\fontspec{Kai}}

\begin{document}
\title{{\Times \LaTeX} 测试}
\author{\Times Jie Chen}
\maketitle

\begin{center}
\Kai 摘要
\end{center}

{\small 这是一个摘要}

\section{第一节}
为什么?
\begin{figure}[ht]
\centering
\includegraphics[width=3cm]{1.eps}
\Times \caption{ interesting \Kai 图片 }
\end{figure}

\Times
I am very proud of this.

\begin{equation}
ax+by=3\sqrt{5}
\end{equation}

\end{document}
%!TEX encoding = UTF-8 Unicode
%test.tex
\documentclass[a4paper,12pt]{article}
\usepackage{fontspec}
\usepackage{graphicx}
%全文使用STHeiti
\setromanfont{STHeiti}
%定义一个会用到的英文字体
\newfontinstance{\enfont}{SimSun}
\newcommand{\en}[1]{{\enfont #1}}

%中文断行用的
\XeTeXlinebreaklocale "zh"
\XeTeXlinebreakskip = 0pt plus 1pt minus 0.1pt

\title{编}
%使用某草体
%\author{\cao 报告书ai}
\author{报告书ai}

\begin{document}
\maketitle
\begin{abstract}
本
\end{abstract}
\section{课}

%使用那个英文字体
\en{
We are english

}

\end{document}
用beamer做幻灯片
下面的例子是在LaTeX环境下,用beamer宏包做幻灯片的最简单的例子。要用beamer这个宏包,当然首先需要安装beamer宏包,同时还需要xcolor,pgf等宏包。
\documentclass{beamer}
% This is the file main.tex
\usetheme{Berlin}
\title{Something very interesting}
\author{Zhan Lu}
\date{\today}
\begin{document}
\begin{frame}
\titlepage
\end{frame}
\section*{Outline}
\begin{frame}
\tableofcontents
\end{frame}
\section{Introduction}
\subsection{Overview of the Beamer Class}
\subsection{Overview of Similar Classes}
\section{Usage}
\subsection{...}
\subsection{...}
\section{Examples}
\subsection{...}
\subsection{...}
\begin{frame}
\end{frame} % to enforce entries in the table of contents
\end{document}
LaTeX中插图入门
在LaTeX下面插图起码有下面epsf,epsfig,graphics三种方式,其中最方便的当属graphics宏包的\includegraphics命令。不过在\caption命令后面好像不能用\url或者是\verb之类的命令,有些朋友说可以在文件最前面加上\usepackage{caption},但是没有成功过。
%%%%%%%%%%%%%%%Inset graphics %%%%%%%%%%%%%%%%%%%%%%%%%%%%
\documentclass[10pt]{report}
\usepackage{epsf}
\usepackage{epsfig}
\usepackage{graphics}
%%%%%%%%%%%%%%%%%%%%%%%%%  %%%%%%%%%%%%%%%%%%%%%%%%%
\begin{document}
%
\begin{figure}[htbp]
  \epsfysize=8cm \epsfbox{1.eps}
  \caption{Use the epsf package}
\end{figure}
%
\begin{figure}[htbp]
    \epsfig{file=1.eps, width=10cm, angle=45}
    \caption{Use the epsfig package}
\end{figure}
%
\begin{figure}[htbp]
   \includegraphics[width=10cm, angle=30] {1.eps}
   \caption{Use the graphics package}
\end{figure}
%
\end{document}
%%%%%%%%%%%%%%%%%%%%%%%%%%%%%%%%%%%%%%%%%%%%%%%%%%%
FORTRAN与c/c++混合编程(二)
在c/c++中调用FORTAN子程序。
两个可执行文件testplus和test得到的结果是一样的。同样也可以写成Makefile简化编译过程,例如:
testC.cpp:
#include <iostream>
using namespace std;
extern "C"
{
        void fr1_(int*,int *);
        int ff1_(int *);
}

int main()
{
        int n=10,nSq,nCube;
        fr1_(&n, &nSq);
        cout << "The square is:"<<  nSq  << "\n";
        nCube=ff1_(&n);
        cout << "The Cube is:"<<  nCube  << "\n";
        return 0;
}

bak.c:
#include <stdio.h>
extern void fr1_(int*,int *);
extern int ff1_(int *);

int main()
{
        int n=10,nSq,nCube;
        fr1_(&n, &nSq);
        printf( "The square is: %d\n", nSq);
        nCube=ff1_(&n);
        printf("The Cube is: %d\n", nCube);
        return 0;
}

testF.f
        SUBROUTINE FR1(N,M)
        M=N*N
        RETURN
        END

        INTEGER FUNCTION FF1(N)
        FF1=N*N*N
        RETURN
        END
编译:
g77 -c testF.f
gcc -c bak.c
g++ -c testC.cpp
g++ -o testplus testC.o testF.o
gcc -o test bak.o testF.o
两个可执行文件testplus和test得到的结果是一样的。同样也可以写成Makefile简化编译过程,例如:
CXX=g++
F77=g77
OBJS=testF.o testC.o
testplus: $(OBJS)
        $(CXX) -o testplus $(OBJS)
.cpp.o:
        $(CXX) -c $<
.f.o:
        $(F77) -c $<
.PHONY: clean
clean:
        -rm testplus *.o
FORTRAN与c/c++混合编程(一)
在很多情况下,有必要用到FORTRAN与c/c++混合编程。下面的例子是在FORTRAN中调用c子程序以及结构。
主程序testF.f
program test
integer ii,jj,kk
common /ijk/ii,jj,kk
real*8 ff
character*32 cc
ii=2
jj=3
kk=4
ff=9.0567
cc='Example of a character string'
write(6,10)ii,ff
10      format('ii= ', i2, ' ff= ', f10.4)
call abc(ii)
write(6,20)ii
20      format('ii= ', i2)
write(6,30)ii, jj, kk
call doubleIJK(cc)
write(6,30)ii, jj, kk
30      format('ii= ', i2, ' jj= ',i2, ' kk= ',i2)
write(6,40)cc
40      format(a32)
stop
end

c文件testC.c
#include <stdio.h>
extern struct
{
int ii,jj,kk;
} ijk_;
int doubleijk_(char *cc, int ll)
{
printf("From doubleIJK: %s\n", cc);
ijk_.ii *=2;
ijk_.jj *=2;
ijk_.kk *=2;
return(1);
}

编译:
gcc -c testC.c
g77 -c testF.f
g77 -o test testC.o testF.o
然后运行./test即可。如果想要简单点的方式也可以写个Makefile:
CC=gcc
F77=g77
OBJS=testC.o testF.o
test: $(OBJS)
     $(F77) -o test $(OBJS)
.c.o:
     $(CC) -c $<
.f.o:
     $(F77) -c $<
.PHONY: clean
clean:
     -rm test *.o
需要注意的是Makefile中,command前面是一个“tab”,不能靠敲空格得到。
2009年3月21日星期六
FreeBSD在VirtualBox下不能安装
经过不下十次的尝试,在VirtualBox2.1.4下面安装FreeBSD 7.1没有成功过。后来在VirtualBox最新版本的手册里面找到了它对FreeBSD的支持不好。不过在安装过程中,老是因为不能把iso中的东西拷贝到虚拟系统,每次都停在不同的位置,这倒是很出乎意料之外。错误的信息也有下面几种形式:
第一种:
Unable to transfer the base distribution from acd0
Do you want to try retrieve it again
Yes No
第二种:
Write Failure on transfer (wrote -1 bytes of 1425408 bytes)
第三种是说什么"no dump ... reboot"
第一种:
Unable to transfer the base distribution from acd0
Do you want to try retrieve it again
Yes No
第二种:
Write Failure on transfer (wrote -1 bytes of 1425408 bytes)
第三种是说什么"no dump ... reboot"
2009年3月20日星期五
Linux下文件批量处理
1.把一个文件拷贝到多个目录
方法一:
需要拷贝的文件:file
目标地址:/tmp/folder/*/keys
find . -path "/tmp/folder/*/keys/" -type d -exec cp /tmp/file {} \;
find /tmp/ -path "/tmp/folder/*/keys/" -type d -exec cp /tmp/file {} \;
方法二:
//File to copy
/var/www/html/file.php
//Directories
/var/www/html/domain1.site.com/include
/var/www/html/domain2.site.com/include
/var/www/html/domain3.site.com/include
/var/www/html/domain4.site.com/include
/var/www/html/domain5.site.com/include
Code:
cd /var/www/html
for DIR in *.site.com/include; do cp file.php ${DIR}/; done
2.批量转换文件格式
把一个目录下左右tiff文件转换成jpg格式
for i in *.tiff
do
   convert "$i" "${i/.tiff}".jpg;
done
Windows XP SP3 in Virtual Box on MacBook Pro
在VirtualBox中的Windows XP SP3.
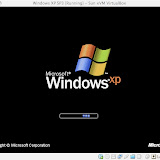 |
| Windows XP SP3 in Virtual Box on MacBook Pro |
Debian Linux in Virtual Box on MacBook Pro
在VirtualBox中的Debian 5.0
 |
| Debian Linux in Virtual Box on MacBook Pro |
Arch Linux in Virtual Box on MacBook Pro
在VirtualBox中的Arch Linux 2009.2
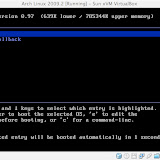 |
| Arch Linux in Virtual Box on MacBook Pro |

订阅:
博文 (Atom)


